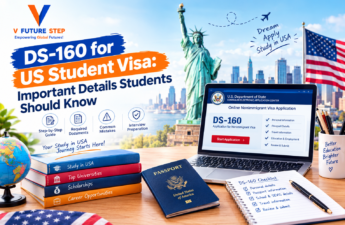
Planning to study in the United States involves several important steps. Students must receive admission, understand their Form I-20, pay the required fees, and prepare for their visa interview. One important part of this process is completing the DS-160 for US Student Visa application. This online form collects personal, travel, education, and background information from nonimmigrant visa applicants.
Completing the form carefully can help you prepare for the next stages of your application. However, students should understand that submitting the DS-160 does not automatically mean that a visa will be approved. It is one part of a wider process that also includes document checks and, in most cases, a visa interview.
If you plan to study in USA, learning about the form before starting can help you avoid common mistakes. This guide explains what the DS-160 is, what information you need, how to complete it, and what to check before submission.
What Is Form DS-160?
Form DS-160 is the Online Nonimmigrant Visa Application used by people applying for many temporary U.S. visa categories. It is completed electronically and submitted to the U.S. Department of State.
Students applying for an F-1 or M-1 visa generally need to complete this form as part of their application. Exchange visitors applying for a J-1 visa also use the DS-160, although their supporting eligibility document is different.
The form asks questions about your identity, passport, travel plans, education, employment history, and other background details. The information helps consular officers review your application and assess your eligibility.
After submitting the form, you receive a confirmation page containing a barcode. You should save and print this page because it is required during the visa application process.
Is the DS-160 the same as the I-20?
No. These documents serve different purposes.
Your Form I-20 is issued by a U.S. school certified to enrol international students under the Student and Exchange Visitor Program. It confirms important details about your program and student status.
The DS-160 is your online visa application. It collects information about you and your intended travel.
Students applying for an F-1 visa usually need both documents. Your DS-160 should contain information that matches your passport and relevant details on your I-20.
Who Needs to Complete the DS-160?
The DS-160 is used by applicants for nonimmigrant visa categories. For students, the relevant category usually depends on the type of course and student status.
F-1 student visa applicants
The F-1 category is generally for international students attending an academic program at an eligible U.S. institution. This may include universities, colleges, and approved academic or language programs.
Before completing the application, check that you have received the required Form I-20 from your school. You will need information from this document while filling out the form.
M-1 student visa applicants
The M-1 category is generally for students attending eligible vocational or non-academic programs. Applicants normally receive an M-1 Form I-20 from their institution.
The form may ask for information that differs according to your visa category. Therefore, check your documents before entering your answers.
J-1 exchange visitor applicants
J-1 applicants participate in approved exchange visitor programs. Their eligibility document is usually Form DS-2019 rather than Form I-20.
Although the supporting document differs, J-1 applicants also use the DS-160.
Documents to Prepare Before Starting
It is better to collect your information before opening the online application. This can reduce interruptions and help you enter accurate details.
Keep the following documents and information ready:
- Valid passport: Check your passport number, name, date of birth, and expiry date.
- Form I-20 or DS-2019: Use the relevant document for your student or exchange visitor category.
- SEVIS information: Students may need their SEVIS ID, which appears on the I-20 or DS-2019.
- School details: Keep your institution’s name, address, and program information available.
- Travel information: Prepare your intended travel details if you have already made arrangements.
- Previous travel details: You may need dates from earlier visits to the United States.
- Education history: Keep information about schools, colleges, qualifications, and previous studies.
- Employment history: Prepare details of your current or previous work if applicable.
- Family information: You may be asked questions about your family members.
- Photograph: Prepare a digital photograph that meets the applicable visa photo requirements.
Not every applicant will be asked for exactly the same information. The form may display additional questions based on your answers and circumstances.
Understand the Main Sections of the DS-160
The application contains several sections. Read each question carefully and enter information that matches your official documents.
Personal information
This section asks for details such as your full name, date of birth, place of birth, nationality, and other identity information.
Enter your name exactly as it appears in your passport. Do not change the order or spelling simply because another format looks more familiar.
If you have used other names, answer the relevant questions accurately. If a question does not apply to you, follow the instructions provided within the form rather than entering random information.
Passport information
You will need to provide your passport number, issuing country, issue date, and expiry date.
Check every digit before moving forward. A small typing error can create a mismatch between your application and your travel document.
If you have recently renewed your passport, use the valid passport details that apply to your application. If your passport information changes after submission, check the instructions of the U.S. Embassy or Consulate handling your case.
Travel information
This section asks about your purpose of travel, intended arrival details, and other travel-related information.
Students should select the visa purpose that matches their actual plans. Do not guess travel dates or enter details that you know are incorrect.
If you have not finalised your travel arrangements, follow the form’s instructions for questions about intended travel. Do not purchase tickets simply because you think the DS-160 requires a confirmed booking.
Education and employment history
You may need to provide details about your current education, previous institutions, qualifications, and employment.
Keep dates and institution names consistent with your records. If you are not currently employed, answer according to your actual situation.
Your academic background should also make sense alongside the program you intend to pursue. Prepare accurate information so you can explain your education choices if asked during the interview.
Enter Your Student and School Information Correctly
Students should pay close attention to the information connected to their U.S. institution. The application may ask for your SEVIS ID, school name, program address, and other details.
Use your Form I-20 as the main reference for the relevant student information. Check that the school name and address match the document. If anything appears incorrect, contact your institution’s international student office before submitting the application.
Your answers should also be consistent with your academic records and intended program. If you are changing your field of study or have a study gap, prepare a clear explanation that reflects your actual circumstances.
How to Complete the DS-160 Step by Step
The application is completed online. Take your time and review each section before moving forward.
Step 1: Start the online application
Open the official online application system and select the location where you intend to apply for your visa. Follow the instructions displayed on the screen.
The system provides an application ID. Save this number securely because you may need it to return to an incomplete application.
Step 2: Complete your personal details
Enter your name, date of birth, nationality, passport details, and other requested information. Compare your answers with your passport before continuing.
Step 3: Add travel and visa details
Answer questions about your intended visit and visa category. Make sure your selected purpose matches your actual student plans.
Step 4: Provide education and background information
Complete the sections about your previous education, employment, travel history, and family details as applicable. Answer every required question truthfully.
Step 5: Upload your photograph
Follow the photo instructions displayed in the application. Your image must meet the applicable technical and appearance requirements.
If the upload fails, check the confirmation page and follow the embassy or consulate’s instructions about bringing a printed photograph.
Step 6: Review the application
Use the review section to check your answers. Pay special attention to names, passport details, SEVIS information, school details, and travel information.
Step 7: Sign and submit
Read the declaration carefully. Submit the application only after checking that the information is complete and accurate.
Why Accuracy Matters
Your DS-160 answers are part of your official visa application. Inaccurate or misleading information can create problems during processing and may affect your eligibility.
For example, entering an incorrect passport number may create a mismatch with your travel document. Similarly, an incorrect SEVIS ID or school address may cause confusion when your student records are reviewed.
Do not copy another student’s answers. Your education, travel history, finances, and personal circumstances are different.
If you are unsure about a question, read the explanation provided in the application. You can also seek clarification from your institution or an appropriately qualified adviser.
What Happens After You Submit the DS-160?
Submitting the form is an important step, but it does not complete the entire visa process.
After electronic submission, you should:
- Save and print the DS-160 confirmation page with its barcode.
- Follow the appointment instructions for the U.S. Embassy or Consulate where you will apply.
- Pay the required visa application fee according to the local instructions.
- Prepare your supporting documents.
- Attend the visa interview if one is required.
The appointment process and document instructions can vary by location. Therefore, follow the guidance provided by the embassy or consulate handling your application.
Remember that the DS-160 for US Student Visa is not a visa approval document. It is an application form used during the assessment process.
Documents to Carry for Your Visa Interview
Prepare a document folder before your appointment. The exact requirements may depend on your case and local instructions.
Commonly required or useful documents include:
- Your passport.
- DS-160 confirmation page.
- Form I-20 for F-1 or M-1 applicants.
- Form DS-2019 for J-1 applicants.
- SEVIS fee payment evidence, where applicable.
- Visa fee payment receipt, if required.
- Academic transcripts and certificates.
- Standardised test results, if relevant to your admission.
- Financial documents showing how your education and living costs will be paid.
- Any additional documents requested by the embassy or consulate.
Keep your original documents organised and carry copies when appropriate. Do not assume that every applicant will need the same supporting papers.
Common DS-160 Mistakes Students Should Avoid
A careful review can help prevent avoidable problems.
Entering incorrect passport details
Always compare the passport number, name, and dates with your actual passport. Do not rely on memory.
Using an incorrect SEVIS ID
Check the SEVIS ID on your current I-20 or DS-2019. If you receive an updated document, make sure you use the correct information.
Providing inconsistent education details
Your education history should be accurate. Check institution names, course dates, qualifications, and employment details before submission.
Uploading an unsuitable photograph
A photo that does not meet the requirements may fail to upload. Follow the current photo specifications and local interview instructions.
Forgetting the confirmation page
The barcode confirmation page is important. Save a digital copy and print a copy for your appointment.
Submitting without reviewing
Do not rush through the final step. Review the full application and correct errors before signing and submitting it.
What If You Make a Mistake After Submission?
If you notice an error after submitting the form, do not assume that you can simply edit the submitted application.
The correction process can depend on the type of error and the instructions of the U.S. Embassy or Consulate where you will apply. In some cases, you may need to complete and submit a new DS-160.
If you have already booked an interview, check whether the appointment details need to be updated with the new confirmation number. Follow the local instructions before making changes.
Keep both your application information and confirmation details organised. If you are uncertain, contact the relevant embassy or consulate for guidance.
Practical Tips for Students Applying From India
Students preparing to study in USA should plan their application around their university’s reporting date and the local appointment process.
Start collecting documents early. Check your passport validity, confirm your I-20 details, and review the financial documents that support your education plans.
Avoid leaving the DS-160 until the last moment. You may need time to correct information, prepare a suitable photograph, or understand a question.
Also, do not make non-refundable travel arrangements simply because you have submitted the form. A visa decision is made separately, and a visa does not guarantee entry into the United States.
Final Thoughts
The DS-160 is an important part of the U.S. student visa process. Accurate answers, organised documents, and careful review can help you prepare for the next steps.
If you plan to study in USA, understand the form before beginning your application. Keep your passport, I-20, SEVIS details, and academic information ready. Most importantly, answer every question honestly and follow the instructions for your visa location.
Preparing the DS-160 for US Student Visa application with care can make the process more organised. It cannot guarantee approval, but it can help you avoid mistakes that may cause unnecessary delays.
How V Future Step Can Help
Planning an international education journey can involve several decisions. V Future Step helps students explore, compare, and choose suitable study-abroad options based on their academic goals, profile, and budget. It also connects students with right-fit agencies and guidance for course selection, applications, documentation, and visa planning.
FAQs
Is the DS-160 required for an F-1 student visa?
Yes. Applicants for an F-1 student visa generally need to complete the DS-160 as part of their nonimmigrant visa application.
Is the DS-160 the same as Form I-20?
No. The DS-160 is an online visa application, while Form I-20 is issued by an eligible U.S. institution to support F-1 or M-1 student status.
Do I need to print the entire DS-160?
Usually, you need to print the confirmation page containing the barcode, not the entire application. Follow the instructions for your interview location.
Can I edit my DS-160 after submitting it?
A submitted form cannot normally be edited like an unfinished application. Depending on the situation, you may need to submit a new form and follow local appointment instructions.
What language should I use in the DS-160?
Answers must generally be entered in English using English characters, except where the form specifically asks for a name in another alphabet.
Does submitting the DS-160 guarantee a student visa?
No. Submission is only one step. A consular officer must assess your eligibility, and approval is not guaranteed.